There’s nothing quite like the feeling of soothingly soft feet. A pedicure is an excellent way to pamper yourself, boost your feelings of well-being and keep your feet healthy and looking their best. A professional pedicure is a real treat, an opportunity to sit back, relax and let a specialist do all the work, and, naturally, a professional will likely deliver the best results. However, it’s possible to achieve almost salon-worthy results at home with a DIY pedicure. And why not create a relaxing, spa-like atmosphere at home while you do that? Here’s our guide to giving yourself a pampering DIY home manicure.
You’ll Need:
- A bowl or foot spa
- Warm water
- Epsom salt or bath salts
- Nail clippers*
- Emery board or nail file
- Cuticle pusher or orangewood stick
- Cuticle oil or moisturiser
- Foot scrub or pumice stone
- Exfoliating foot scrub
- Foot lotion or cream
- Nail polish remover (if you have old nail polish)
- Base coat, nail polish, and top coat (if you wish to varnish your nails)
- Towel
- Cotton pads or balls
* A note about nail clippers: if you use nail clippers, make sure that they are sharp. Old or much used nail clippers should be replaced. The key is to avoid chipping your nails, which is more likely to occur with blunt clippers. If your nails are already short, it is preferable simply to file them down to your desired length and shape.
Step 1: Set the Mood
First of all, you need to choose a time when you will not be disturbed – or at least, when you feel able to ignore disturbances! Start by creating a relaxing ambiance. Put on some soothing music, dim the lights, perhaps light a scented candle. Make sure you have all your materials within reach for a seamless experience.
Step 2: Remove old nail polish
If you have old nail polish on your toenails, remove it using nail polish remover and cotton pads or balls.
Step 2: Soak Your Feet
Fill a bowl or foot spa with warm water. Add a couple of tablespoons of Epsom salts or bath salts to help soften your skin and relax your muscles. Soak your feet for 10-15 minutes to soften the nails and skin.
Step 3: Trim and Shape Nails
After soaking, dry your feet with a towel. File and/or clip your nails. If using clippers, trim your toenails straight across. Avoid cutting them too short, as this can lead to ingrowing toenails. Use an emery board or nail file to shape the nails, rounding the corners slightly to prevent them catching on clothing.
Step 4: Deal with Cuticles
Apply a small amount of cuticle oil or moisturiser to your cuticles and gently push them back with a cuticle pusher or orangewood stick. Be gentle to avoid causing damage or soreness.
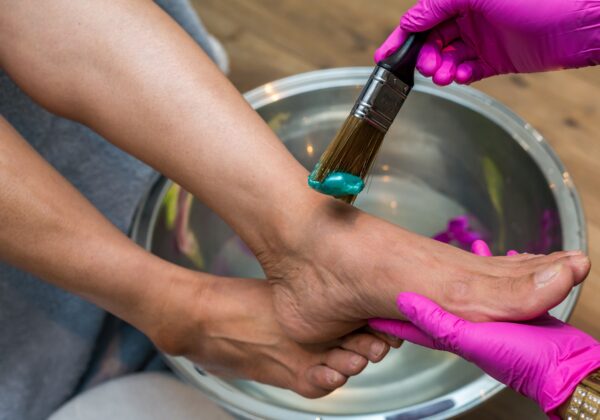
Step 5: Exfoliate
Use a foot scrub or pumice stone to exfoliate your feet, paying attention to rough areas like the heels and the balls of your feet. This will remove dead skin cells and leave your feet feeling soft and smooth. A few minutes’ gentle massage with an exfoliating foot scrub or body scrub not only exfoliates the skin, but can also improve circulation and provide relaxation. Rinse off and carefully dry your feet.
Step 6: Moisturise
Apply a rich foot lotion or cream, massaging it into your skin. Focus on the heels and other dry areas. This helps lock in moisture and keep your feet soft.
Step 9: Apply Nail Polish
This is a time to add a splash of colour, if you like. Applying nail polish well is tricky and takes a bit of practice. Start with a clear base coat to protect your nails. Once that’s dry, apply your desired nail polish colour. Allow it to dry completely between coats, and finish with a clear topcoat for a glossy finish.
Step 10: Relax and Enjoy
Give your nail polish ample time to dry completely before putting on any socks or slippers. (When you think it’s dry, wait a little longer!) Sit back, relax, admire your beautifully manicured feet, and congratulate yourself on a job well done.
A DIY pedicure takes a little effort but that can focus the mind and allow you to “get into the zone” and think of nothing else for a while. It is a wonderful way to pamper yourself and keep your feet looking and feeling their best. With a few easily-available tools and a bit of patience, you can achieve great results at home. So, take a bit of time for yourself. Your feet will thank you, and you’ll feel more confident from head to toe!